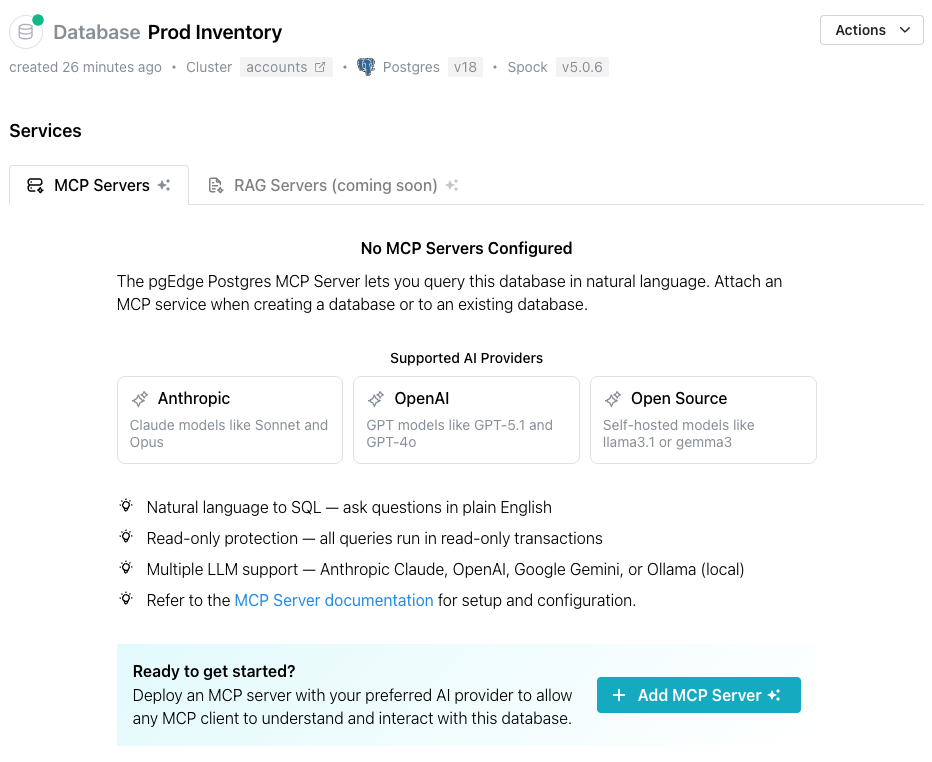
Creating and Managing AI Toolkit Services
pgEdge Cloud databases can be deployed with an installed and configured
MCP server, ready for connections. After deployment, use the Services
dialog to open the Add MCP Server popup to add AI functionality to an
existing cluster or to manage defined functionality.
Adding an MCP Server
Select the + Add MCP Server button to access the Add MCP Server popup
to define an MCP server and optionally enable an LLM.
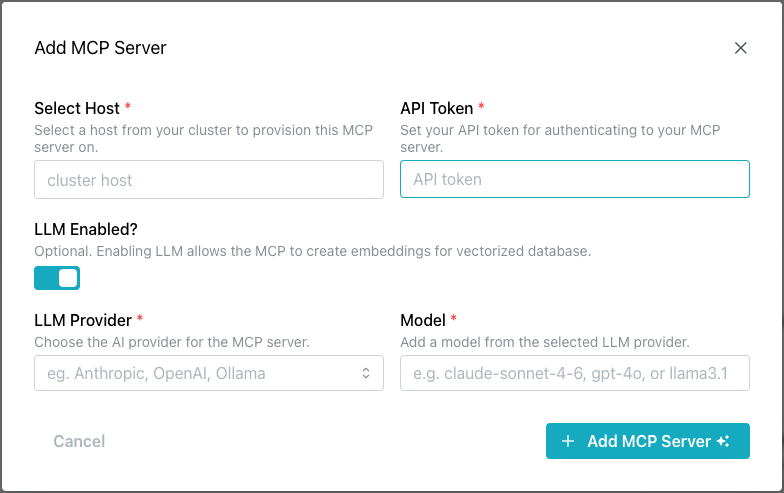
Use the fields on the Add MCP Server popup to describe the server
and, optionally, the LLM:
-
Use the
Select Hostfield to select the cluster host on which this MCP server will be provisioned and run. -
Use the
Target Nodesfield to optionally select the database nodes this MCP server connects to, in priority order. Defaults to all nodes. -
Use the
Allow Writes?toggle to optionally grant the MCP service read-write access (INSERT / UPDATE / DELETE) via thequery_databasetool. Note that allowing read-write access could potentially expose data to unexpected or unwanted modifications. -
Use the
LLM Enabled?toggle to optionally enable an LLM to generate embeddings for the database. When the toggle ison, Cloud activates thegenerate_embeddingtool on the MCP server and requests LLM provider credentials. To enable an LLM, provide the following information:-
Use the
Embedding Providerfield to select the provider used by thegenerate_embeddingtool on the MCP server. -
Use the
Embedding Modelfield to specify the model identifier used by thegenerate_embeddingtool (e.g.text-embedding-3-small,voyage-3). -
Use the
Embedding API Keyfield to enter the API key for the selected embedding provider. This key is stored encrypted server-side.
-
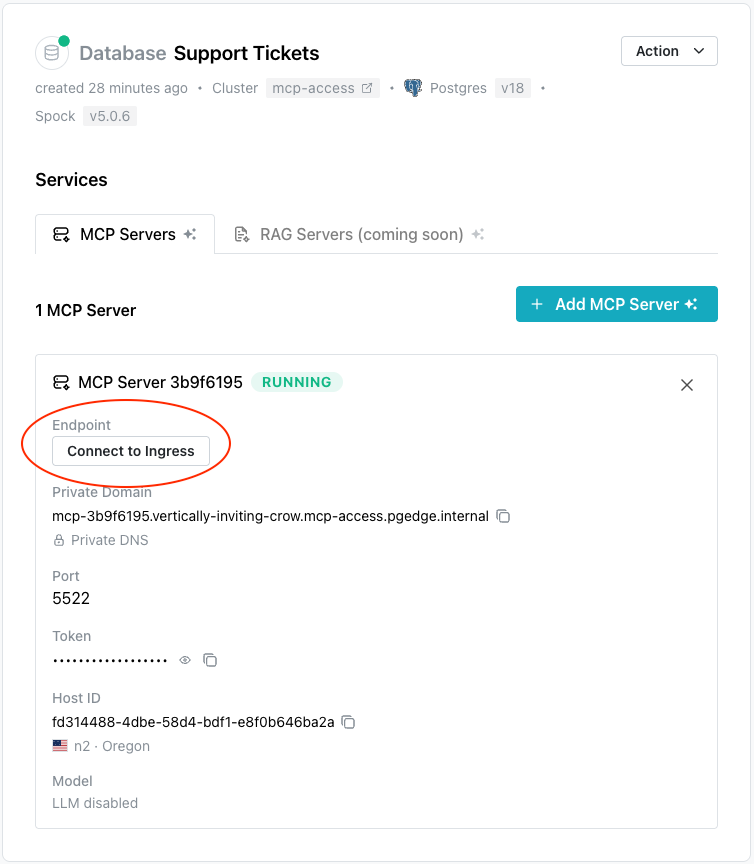
When the MCP server has been defined (with optional LLM functionality),
select the + Add MCP Server button to update the database. The Services
dialog displays the MCP server deployment details when the deployment is
complete.
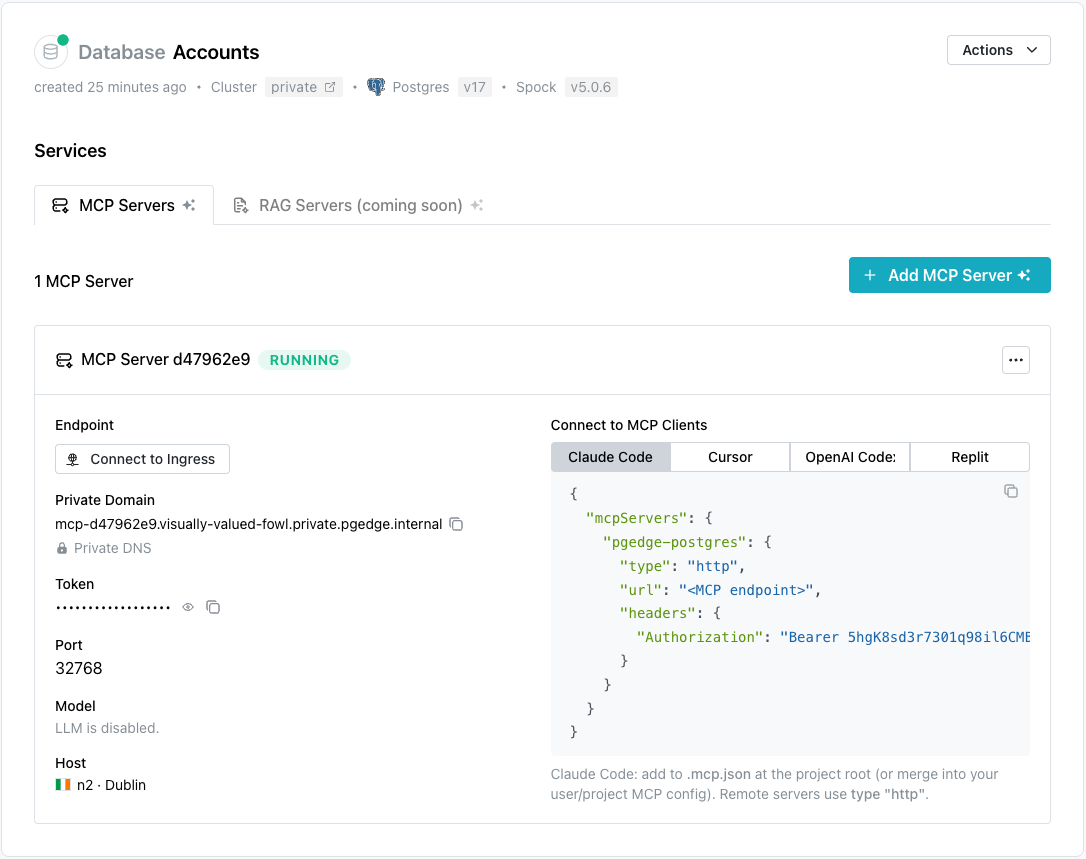
Connecting a Client to the MCP Server
The steps for connecting a client to the MCP server vary by client
and platform. The Services dialog displays connection details for several
popular clients under the Connect to MCP Clients label:
Select a tab to view and copy connection details for the selected client. Choose from:
Adding a RAG Server
Select the Add RAG Server button to access the Add RAG Server popup
to define a RAG server and optionally enable an associated LLM.
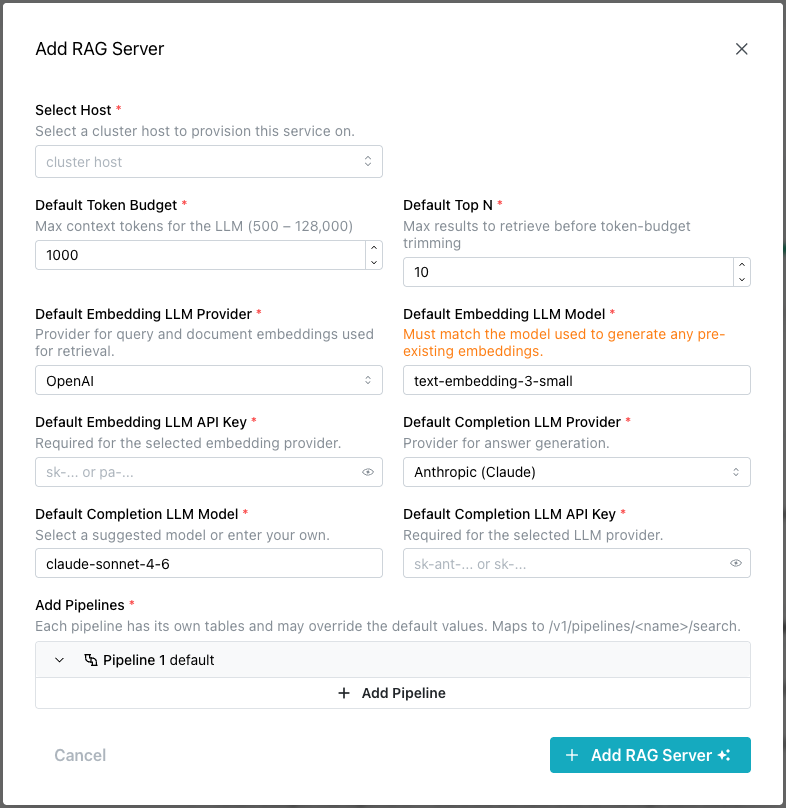
Use the fields on the Add RAG Server popup to describe the server:
-
Use the
Select Hostfield to select the cluster host on which this RAG server service will be provisioned and run. -
Use the
Default Token Budgetfield to set the maximum number of context tokens (500–128,000) the LLM can process per request. -
Use the
Default Top Nfield to set the number of results retrieved from the vector store before they are trimmed to fit within the token budget. -
Use the
Default Embedding LLM Providerfield to select the provider whose model will generate vector embeddings for queries and documents during retrieval. -
Use the
Default Embedding LLM Modelfield to specify the embedding model to use. This must match the model used to generate any pre-existing embeddings in the dataset. -
Use the
Default Embedding LLM API Keyfield to enter the API key for authenticating with the selected embedding provider. -
Use the
Default Completion LLM Providerfield to select the provider whose model will be used for answer generation after relevant documents are retrieved. -
Use the
Default Completion LLM Modelfield to specify the model used for answer generation. Select a suggested model or enter a custom one. -
Use the
Default Completion LLM API Keyfield to enter the API key for authenticating with the selected completion provider.
Expand the Add Pipelines field to define one or more named pipelines.
For information about pipelines, see the
pgEdge RAG Server documentation.
Each pipeline specifies one or more
tables
and their associated columns and vector columns.
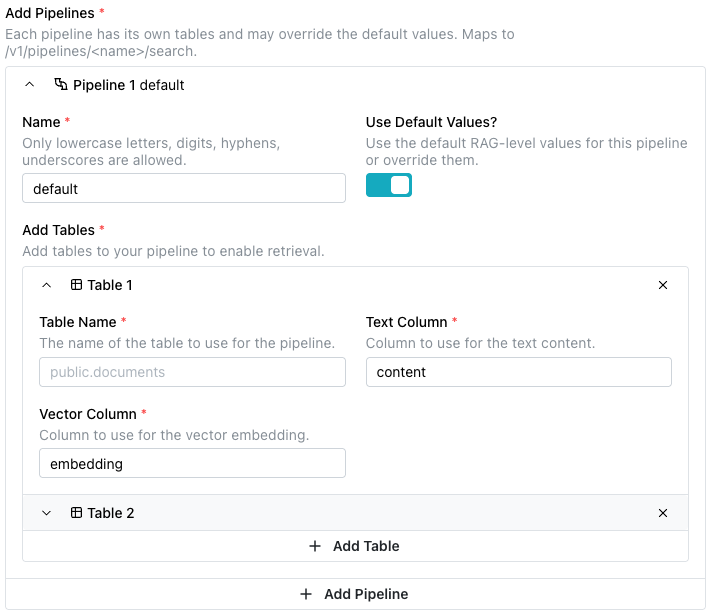
Use the:
+ Add Tablebutton to access fields to define additional tables.+ Add Pipelinebutton to access fields to define additional pipelines and associated tables.
When you're finished defining the RAG server, select the + Add RAG Server
button. The Services dialog displays the RAG server deployment details when
the deployment is complete.